
I specifically made a dinosaur pinata, but you can follow these instructions to make a pinata in whatever shape you would like!

How To Make Your Own Pinata:
YOU WILL NEED:
- Large pieces of cardboard. A large cardboard box works well
- Masking Tape (I've heard duct tape is a no-no because it's too sturdy...)
- Colored Crepe paper
- Glue stick
- Things to fill the pinata (see below for some frugal ideas)
- Accessories as desired (I used pompoms for the eyes and rolled up paper for the teeth)
- Rope for hanging pinata
DIRECTIONS:

- First trace a design for your pinata on the cardboard and cut it out. The simpler your shape the easier the later steps will be. We were doing a dinosaur theme party so I cut out a simple dinosaur shape. Once your first shape is cut out, you will need to trace that shape onto another section of cardboard so now you will have two identical pieces of cardboard for front and back pieces of the pinata.
- Now I forgot to do this step and it make it a little difficult so I'm adding it to help you out. Punch a hole in the same place for the front and back pieces of cardboard where you will hang your rope. I suggest several inches down from the top to make sure it has some strength at the top where the rope will hang.
- Next you will need to cut strips of cardboard out to tape around the pinata to make it three-dimensional. I used about 3" wide strips of cardboard. It doesn't matter how long each strip is. The amount you will need depends on how large your pinata is - it will cover the whole circumference of whatever shape you chose.
- Starting at the top of the pinata (which is where the hole will be where you can fill the pinata), start taping the front and back pieces on either side of the 3" wide strips of cardboard. Keep going around the shape of your pinata (this is why the simpler shape the better). When one strip runs out, just use another strip and line it up right where you left off with the other. When you get back to the top, leave a hole in the top with a strip of cardboard left over that you can tape later after you fill the pinata. This part doesn't have to look pretty - it will be covered. :) Use more or less tape depending on how sturdy you want it. This will depend on the age of kids and how many you would like the pinata to last through. The amount of tape shown in this picture lasted through about 10 five-year-olds.

- Fill the pinata with whatever you would like (see below for some frugal pinata filler ideas).
- Once your pinata is filled, tape the opening you left earlier so that it's secure.
- Now it's time to decorate the pinata. Take the colored crepe paper and cut strips to the length that you will need to cover one layer from side to side. These strips will be different depending on where you are at on your pinata. You can fringe the crepe paper by cutting part way through as shown in the picture. Starting at the bottom of the pinata, glue on a layer of crepe paper fringe across the bottom. Then glue on the next layer just above that one, allowing the fringe to overlap and hide the ugly cardboard and tape mess underneath. Repeat all the way up that side and all the way up the other side (yes this is a bit time consuming, but it goes quick when you get the hang of it). Then do the same thing on the 3" sides, starting at the bottom and go up either side with the fringe crepe paper pieces.
- Add any accessories that you would like to make it look more realistic. For our dinosaur pinata I added a white pom-pom to either side (I used a permanent marker to black out an eye). And for the teeth I just rolled up pieces of paper into cones and glued them on the bottom of the mouth.

- Thread the rope to hang the pinata through the holes that you pre-punched earlier (they may be slightly covered by the crepe paper fringe but that's okay).
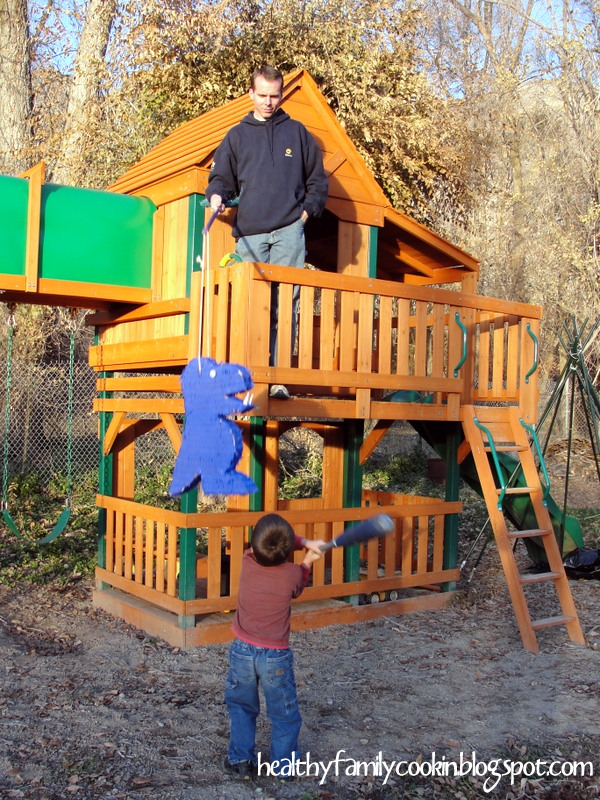
- Now your pinata is done and ready for the party. When it's time, hang your pinata (we used a broom with my husband on top of the playhouse moving it up and down) and let the kids go to town. Watch as all your hard work becomes disintegrated in a matter of minutes. But seeing the laughter and smiles on the faces of your child and his/her friends will make it all worth it.

 |
| Add a fringe to the crepe paper to make it look more decorative |
Here are a few frugal ideas you can use to fill the pinata:
Frugal Ways to Fill a Pinata
- Confetti - Strips of newspaper, all those polka dot things from your hole punch, paper from your shredder, use recyclables you have on hand. Confetti will give the appearance of the pinata being more full and just make it more fun when it opens up.
- Pennies - Will be a lot cheaper than other fillers and the kids will love running around collecting money
- Leftover candy from Halloween or Valentines or Easter or whatever holiday is closed to your child's birthday. Let your kids eat it for a day or two after the holiday, then absorb it into your "pinata collection" and use it for the next birthday party.
What about you? Have you tried making your own pinata? Do you have any frugal pinata filler ideas? I'd love to hear them. Happy Frugal Friday everyone. Hope you have a wonderful weekend.
Linking with some of these link parties.
Linking with some of these link parties.
.JPG)


2 comments:
Such a fun idea. I never would have thought to make my own.
I LOVE, LOVE, LOVE this idea! Thanks for sharing it : )
MY Little One has been wanting a pinata for the longest time, and her favorite thing right now is dinosaurs! This is great!
Post a Comment