Showing posts with label Breakfasts. Show all posts
Tuesday, February 3, 2015
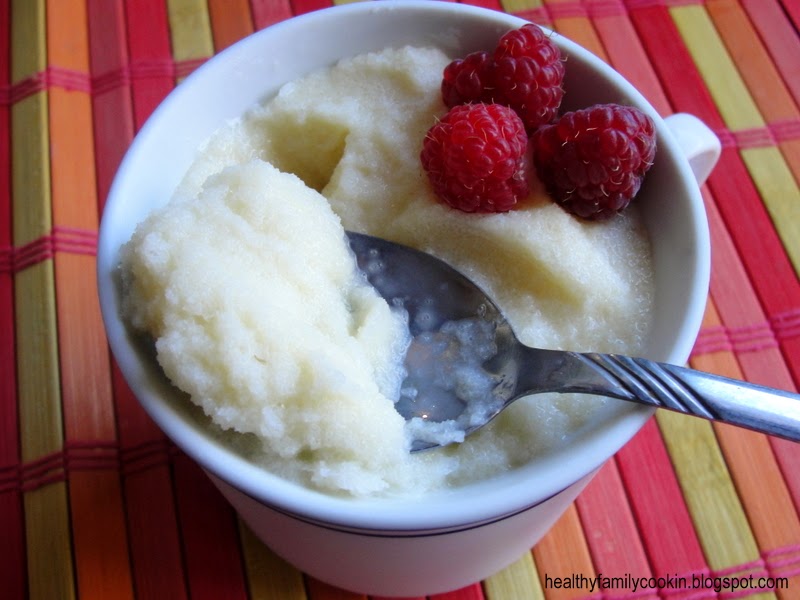
Orange Kefir Breakfast Shake
Have you met my friend kefir yet? If not, you really need to! Kefir milk is full of wonderful probiotics that are bodies need to keep us well. I'm always on the lookout for more ways to incorporate kefir into my family's diet, especially in the winter time. We love smoothies, but sometimes they are too cold for my kids in the winter. This orange kefir breakfast shake is a great way to get your kefir in the morning without freezing your little toesies off in the process. Hope you enjoy!
Orange Kefir Breakfast Shake
Printable Recipe
*Makes 4-5 Cups
INGREDIENTS:
3 Cups Kefir Milk
2 fresh oranges, peeled
1/2 tsp. vanilla
1 heaping Tbsp. honey + more to taste
1/2 ripe banana (I sometimes use a frozen one)
DIRECTIONS:
In a blender, combine the kefir milk, oranges, vanilla and honey and blend well (until honey is dissolved). Add ripe banana and blend until smooth. Serve immediately or refrigerate until ready to serve.
Recipe Source: healthyfamilycookin.blogspot.com
Tuesday, November 4, 2014
Orange Julius {With Kefir}
Temperatures are cooling and the sick season is upon us. I've been trying to be vigilant about giving myself and my kids kefir every day to help them fight off the germs that they are surrounded with. This is one of our favorite ways to get our daily dose of kefir.
This Orange Julius is so easy to make and so yummy. We love to have it for breakfast, but it works with any meal or as a snack. The Orange Julius in my pictures might look a little more frozen then yours will turn out if you follow my recipe. I actually made it for my kids for breakfast that morning and didn't have time to snap any pictures so I stuck it in the freezer for about a half hour before I took the pictures. It crystallized just a little and turned out really yummy. Kind of like a frosty.
If you don't have kefir milk and still want to make this recipe, you can substitute regular milk. It will work great. Make sure you read up on kefir though. It's really good for you. We use the kefir to make sure we get all the wonderful probiotics (especially this time of year) that our bodies need.
Orange Julius {With Kefir}
Printable Recipe
*Makes 4 servings
INGREDIENTS:
2 Cups kefir milk
1 Cup orange juice (freshly squeezed is really yummy, but any kind will work great)
1/2 tsp. vanilla
1/4 Cup honey
2 Cup ice cubes
DIRECTIONS:
Combine kefir milk, orange juice, vanilla and honey in blender and blend for about a minute until honey is dissolved. Add ice cubes and blend until frothy. Serve immediately.
Recipe Source: healthyfamilycookin.blogspot.com
Wednesday, September 24, 2014
Green Kefir Smoothie
Did you catch my post on Monday about Kefir? I hope so because today I'm going to share a recipe that uses the Kefir milk that I described making in that post. This is my favorite kefir smoothie that I drink almost EVERY SINGLE day for breakfast (I'm actually drinking some right now as I'm writing this...). I usually make the whole recipe and then put half in the freezer for the next day so I only actually have to do the work every other day. Lazy, huh? The next day I just pull the frozen kefir smoothie out of the freezer about an hour or two before I'm ready to eat it and it's ready to go. It makes a great on-the-run breakfast. I actually use this smoothie as a meal replacement (half the recipe is perfect) and it works well to add the chia and flax seed to give it a little more substance. I'll sometimes have a little bit of toast or an egg or something on the side if I need a little more carbs or protein that day.
This smoothie is packed full of healthy foods, but it tastes wonderful and refreshing. If you're worried about the greens you can of course leave them out, but they are such a great way to get your servings of green vegetables that your body needs. You really shouldn't taste anything "green" in this smoothie. If you are, you need to add more frozen fruit. Berries work the best for masking the "green-ness" but I also love peaches. I love to change, mix and combine the fruit and make the smoothie taste a little different each day. The raw honey also helps mask the "green" taste, but there is another great reason to eat a little every day. Local raw honey can help with allergies. We've been buying raw honey from a local beekeeper for a few years now and have seen a great difference with our allergies.
I should mention one more thing really quickly before leaving you to enjoy this great recipe. This is a great time of year to find fruit that's going to waste to freeze for your supply of smoothies this year. From my experience, even if fruit is a little past its prime, it will still work well blended up in a smoothie.
Well I hope I've got you convinced to try making this yummy smoothie. If you have any questions, please feel free to leave a comment. I appreciate all your comments and read and try to respond to as many as I can. I hope you are enjoying fall. Have a wonderful day.
Green Kefir Smoothie
Printable Recipe*Makes 3-4 Cups
INGREDIENTS:
2 Cups kefir milk (or you can use half milk/half plain yogurt)
1 Tbsp. chia seed, optional
1 Tbsp. flax seed, optional
1 scant Tbsp. raw honey
1 packed cup fresh spinach or other greens (chard, kale, turnip greens, etc.)
1 frozen banana
1-2 Cups your choice frozen fruit (strawberries, peaches, mangoes, blueberries, raspberries, blackberries, pineapple, etc)
DIRECTIONS:
Add all ingredients in order to a large blender and blend until smooth. Taste and add more frozen fruit if needed. Blend for 2 minutes on high. Serve immediately.
Recipe Source: healthyfamilycookin.blogspot.com
Tuesday, August 12, 2014
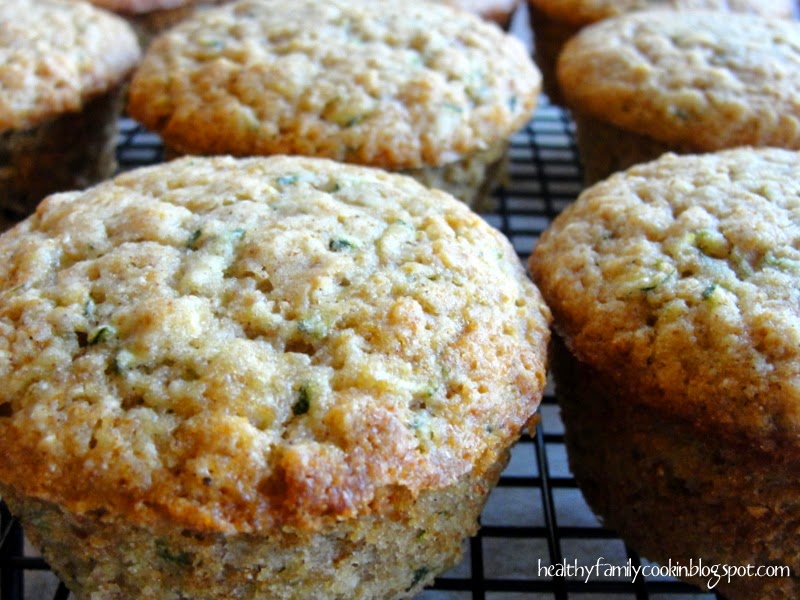
Fresh Zucchini Muffins
I don't know about you but school is sneaking up on me way to fast. All to soon the rush will be here again and questions of "What's for breakfast?", "What's for lunch?", and "What's for snack?" will plague me every day times two. Sometimes thinking up creative answers to those questions is difficult. My first grader won't even eat a sandwich so that throws some extra fun into the school lunch mix this year.
In my efforts of late that alternate between freaking out and trying to prepare for those inevitable school days just around the corner, I ran across this recipe that I started perfecting last year but never finished before I ran out of the zucchini harvest. Well I'm happy to report that my zucchini harvest is back in full swing so I've completed the task and this recipe is wonderful in it's perfected state. Delicious, moist, and light. Healthy, hearty, and sweet. These tender morsels of yumminess are just the thing for an easy breakfast, lunch or snack.
But before you take the same path I did, I have to warn you. Don't even think that making a double or even triple batch of these yummy muffins and freezing them will somehow make it so you have frozen muffins when you need them during a hectic school day. Not a chance. These things have disappearing properties that are amazing. I haven't scientifically figured out how that works yet, but trust me it's true. Consider yourself warned.
Fresh Zucchini Muffins
Printable Recipe
*Makes 12 muffins
*Note: These muffins freeze well so go ahead and make a double or triple batch!
INGREDIENTS:
1-1/2 Cups Wonder Flour
1/2 Cup Quick Oats
1/2 tsp. salt
2 tsp. baking powder
1/2 tsp. cinnamon
1/4 tsp. nutmeg
1-1/2 Cups grated zucchini (about 2 small zucchini's, grated)
1/2 Cup honey
2 eggs
1/3 Cup canola oil
1 tsp. vanilla extract
DIRECTIONS:
Preheat oven 350 F. Grease 12 muffin tins or line with crinkly paper cupcake liners. In a medium bowl whisk together Wonder Flour, quick oats, salt, baking powder, cinnamon, and nutmeg. Set aside.
In a large bowl combine grated zucchini, honey, eggs, canola oil, and vanilla. Stir well to combine, then add the flour mixture and mix until barely combined. Be careful not to over-mix or you will end up with dense muffins.
Fill muffin tins with about 1/3 Cup muffin batter. Bake in preheated 350 F oven for 25 minutes or until muffins turn golden brown.
Recipe Source: healthyfamilycookin.blogspot.com
Wednesday, May 7, 2014
Cheesy Hashbrown Potatoes {With Quinoa}
Every now and then you need a yummy potato side dish to go with a delicious main dish. Potatoes are cheap and "comfort-foody". I love to pair potatoes with cooked white quinoa in my potato side dishes to increase their nutrition even more. White quinoa is the perfect choice because it's color makes it easy to disguise to unsuspecting persons (a.k.a. kids or other picky eaters). Adding the white quinoa adds a perfect protein to this dish. As well as all kinds of other nutrition that you can read about in quinoa's meet new foods spotlight.
This recipe is perfect to serve as a breakfast or breakfast-for-dinner side dish. It also accompanies meat main dishes very well (we served this with ham on Easter this year). I've served this with this fish and roasted squash dish that I absolutely adore (I used hubbard quash instead of butternut this time - oh my! Yum). Anyway you go, you can't go wrong with this recipe. It's versatile and wonderful. It will appear again and again on our dinner table. I hope your family enjoys it too.
Cheesy Hashbrown Potatoes {With Quinoa}
Printable Recipe
*Serves 8-10
*Note: I sometimes halve this recipe to serve with my family of 4. Just halve all ingredients and bake in a 9x9 square pan. It works great!
INGREDIENTS:
8-9 medium/large potatoes
1/4 Cup white quinoa
2 Cups shredded cheese of your choice (My choice would be a cheddar/jack blend)
2 Cups milk
4 Tbsp. butter
1-1/2 tsp. salt
1/4 tsp. pepper
Shredded Parmesan cheese
DIRECTIONS:
Preheat oven to 350 F. Wash and scrub potatoes. Cook potatoes according to one of the following methods of your choice.
Pressure Cooker Method (My first choice of course):
Add whole, unpeeled potatoes to pressure cooker along with 1-2 cups of water. Cook on high pressure for 2 minutes (for large potatoes cook for 3 minutes). Release pressure naturally.
Boiling Method:
Place whole, unpeeled potatoes in a large pot of boiling water. Boil for about 15 minutes, or just until potatoes are starting to get tender.
While potatoes are cooking, cook 1/4 cup quinoa in small pot with 1/2 to 2/3 cup water. Start with 1/2 cup water and add more if needed during the cooking process. Heat quinoa and water to boiling and then turn heat down to a simmer and cook for 10-15 minutes or until quinoa is tender and displays a white curl from the seeds. If you have two pressure cookers, you can also cook quinoa in the pressure cooker. It cooks in 6 minutes on high pressure and I use a 1:2 ratio of quinoa to water.
When potatoes are done cooking rinse in cold water and peel. The skins should peel easily with a little bit of pressure. Cool and dry the potatoes. Once the potatoes are dry, grate them with a cheese grater so they resemble hashbrowns.
Place shredded potatoes and cooked white quinoa in a 9x13 pan. Sprinkle with shredded cheese and stir lightly to combine. Heat milk, butter, salt, and pepper in a separate pan until butter is melted. Pour over the potato/cheese mixture. Sprinkle generously with Parmesan cheese.
Bake 350 F for 50-60 minutes, or until cheese is browned. You can also broil the top for a couple of minutes if you want the extra burnt cheese flavor (mmmh...burnt cheese...). Let stand 5 minutes before serving.
Recipe Source: Adapted from Money Saving Mom, added white quinoa, pressure cooker method and pepper.
Tuesday, January 14, 2014
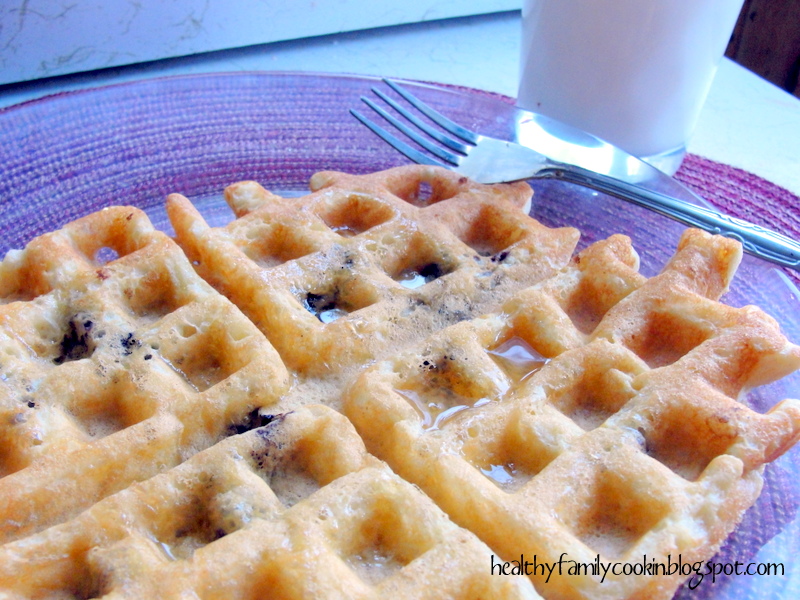
Blender KAMUT® Pancakes/Waffles
Have you heard of KAMUT®? Sometime in the future I plan to do some more segments of my Monday meet new foods posts so you can be introduced properly to this amazing grain. But for now, I'll just tell you that I love this grain. It is totally amazing. It's actually a type of wheat and you can often use it in place of wheat. But it has a different flavor and is soooo good. You can find KAMUT® at most health food stores. It's a little costlier than wheat, but not too expensive. Well worth it for recipes like this, let me tell you!
This is one recipe where it really shines like a superstar. This recipe also uses buttermilk, which is one of my favorite things in pancakes. Remember my post about how to culture your own buttermilk? That might come in handy for this recipe cause once you try them, you're gonna have to make them a lot.
Blender KAMUT® Pancakes/Waffles
This is one recipe where it really shines like a superstar. This recipe also uses buttermilk, which is one of my favorite things in pancakes. Remember my post about how to culture your own buttermilk? That might come in handy for this recipe cause once you try them, you're gonna have to make them a lot.
*Makes about 12 small-to-medium pancakes or waffles
INGREDIENTS:
1 Cup KAMUT® kernals (the grain itself, not the flour)
1 Cup Buttermilk
1/2 Cup milk
2 large eggs
1 Tbsp. honey
5 Tbsp. butter, melted
3/4 tsp. salt
1 Tbsp. Rumford baking powder (the brand will matter on this)
DIRECTIONS:
Preheat your griddle or waffle iron. Then combine the KAMUT® kernals and the buttermilk in a high powered blender (You will need at least 6 cups capacity. I use a Bosch, but any powerful blender will work) and blend on high for 3 minutes until the mixture has a thick, creamy texture. I always set a timer for this because it's usually longer than I think. Let's face it, the blender is loud and it's easy to think it's been enough time when it really hasn't. So set your timer and wait it out. It will be worth it, believe me. Then add the 1/2 cup milk and continue to blend for 2 more minutes. Timer again please - two minutes is longer than you think. Then add all the remaining ingredients except the baking powder and blend until smooth (this should not take long). Finally add the baking powder and pulse a time or two until it is combine. You don't want to mix it too much once the baking powder is in there or it might not poof up as much as it should. Now stand back amazed as the mixture starts to grow. My kids love this. They think it's an amazing magic trick. Let it grow for a few minutes and then start to cook your pancakes or waffles on the hot griddle or waffle iron. Remember don't mix anymore. It will still continue to grow while you're cooking. Just let it do it's thing.
Variation:
We like to add fresh or frozen, unthawed blueberries for blueberry waffles or pancakes. Yum!
Serving Suggestion: We like to serve these topped with fresh fruit and drizzle them with raw honey or Xagave.
Recipe Source: healthyfamilycookin.blogspot.com adapted from a few other recipes found on the web and perfected
Amazingly light and puffy. Delicious. And if you're kids are partial to color, which I know mine are, you and they will love these because they are so light colored they look like they were made with white flour, but they are whole grain. Totally awesome!
Have you tried KAMUT®? What did you think?
Tuesday, July 23, 2013
Healthy Blueberry Muffins {Sugar Free}
Okay it's been a little while since I've shared a sugar free recipe with you. Okay maybe not. But you never can have enough sugar free recipes when you're trying to be sugar free. And these are amazing. Whole Grain. Sugar Free. Blueberry Muffins. You need these. Especially right now. I need 'em too. I need to have a whole load of them in my freezer for those busy mornings when I don't feel like cooking breakfast. Which has seemed like most mornings these days. Things have been rather crazy around here.
And speaking of crazy, how has sugar been at your house lately? July has been a month of a lot of holidays and vacations for us. And sugar free just may have slipped a little around here. My son maybe just maybe was encouraged to eat all of his fourth of July parade candy in one day and then may have been sick to his stomach all the next day. But those little teaching moments do the trick, let me tell ya! Now he controls it himself instead of us nagging him about it. Sometimes you just have to let them learn by experience. The "not-nice way" as our family sometimes calls it.
And...after slipping in a few extra days of sugar myself I am here to tell you that I feel a huge difference when I stick to my goal and when I don't. I noticed that when I'm sugar free I feel more energy. Less sluggish, less crabby. And I crave good, healthy food. I'm resolved to do better and get back on track because I know it makes a difference.
Good recipes help when you're trying to change your diet. And these muffins are not only healthy, but also very delicious. I hope you enjoy them as much as I do.
Healthy Blueberry Muffins
Printable Recipe
*Makes 24 muffins
INGREDIENTS:
3 Cups Wonder Flour
1-1/2 tsp. baking powder
1-1/2 tsp. salt
1/2 Cup canola oil
1 Cup honey
3 eggs
1-1/2 Cup milk
1-1/2 tsp. vanilla extract
1 Cup blueberries, frozen or fresh
DIRECTIONS:
Preheat oven to 350 F. Line 24 muffin tins with muffin liners, if desired, or spray well with oil. In a medium bowl, combine the Wonder Flour, baking powder and salt and set aside. In a large bowl whisk together the oil, honey, eggs, milk and vanilla. Add the dry ingredients to the wet ingredients and whisk until just barely combined. Be sure not to over beat, as it will cause the muffins to be tough. Add the frozen or fresh blueberries and stir to combine. Pour about 1/4 to 1/3 cup of the mixture into the lined or greased muffin tins until cups are mostly full. Bake at 350 for 25-30 minutes or until toothpick inserted in the center of the muffins comes out clean.
Recipe Source: healthyfamilycookin.blogspot.com
I made these for a family reunion breakfast and everyone loved them. They are also great frozen and reheated for a few seconds in the microwave.
Tuesday, June 18, 2013
Buttermilk Coconut Syrup {Sugar Free}
Sugar free has been such a great adventure this year. I have loved discovering amazing recipes that are sugar free. This is one of those recipes that you have to make to believe. This syrup is like tasting a piece of heaven. I adore it. I dream about it. It is happily ever after. And it's sugar free. Really, it's too good to be true.
In all honesty, I could eat this syrup plain, but it's probably best (and maybe a little healthier) if it's served over a whole grain waffle like this one or this one or this one or some buttermilk pancakes (in a recipe still to come...) or french toast made from whole wheat bread (pictured below). So pick your favorite and get making it. Hey, why not breakfast for dinner tonight? Your family will love you for it.
Just in case you're thrown off by the "coconut". Let me just say that I'm not really a coconut person. I don't really like the texture. But I adore this syrup. It really doesn't even taste like what you would imagine coconut syrup to taste like. It's just deliciousness at it's finest.
And in case you're wondering, this IS the recipe that I alluded to it in a post just a few weeks ago in my post about culturing your own buttermilk. And yes, you do need to use real buttermilk for this, please don't sub that ingredient. One substitution you can make if you're looking to go healthier is using coconut oil instead of butter. I made it last time with coconut oil and raw honey and really couldn't tell much of a difference. If you made some with butter and without and put them side by side, I'd probably say I preferred the one with butter (it's got that yummy buttery flavor), but coconut oil works great and does have some great health benefits.
Can I just beg you to try this recipe? It's one of my favorites and you'll be glad that you did. If you do, I'd love to hear your feedback or any questions or comments. Thanks in advance for sharing; feedback from you is one of the big reasons why I love blogging. Happy cookin'!
This week I'll be linking to some of these link parties.
In all honesty, I could eat this syrup plain, but it's probably best (and maybe a little healthier) if it's served over a whole grain waffle like this one or this one or this one or some buttermilk pancakes (in a recipe still to come...) or french toast made from whole wheat bread (pictured below). So pick your favorite and get making it. Hey, why not breakfast for dinner tonight? Your family will love you for it.
Buttermilk Coconut Syrup {Sugar Free}
INGREDIENTS
1/2 Cup Butter or Coconut Oil
1/2 Cup Xagave or raw honey*
1/4 Cup Buttermilk
1/2 Tbsp. Ultra-gel or 1 tsp. Cornstarch
1/2 tsp. Coconut extract (or other flavoring, but Coconut is my fav; imitation works fine)
1/2 tsp. Baking soda
DIRECTIONS
In a medium saucepan over medium heat, combine butter or coconut oil, Xagave or honey, buttermilk and ultra-gel or cornstarch. Make sure you whisk well while the mixture is still cool to ensure that the ultra-gel or cornstarch doesn't clump. Heat and stir continuously until butter or coconut oil is melted and mixture starts to bubble. Then remove pan from the heat and stir in 1/2 tsp. coconut extract and 1/2 tsp. baking soda. Mixture will bubble ferociously and leave you with a frothy, delicious syrup.
Best served immediately over pancakes, waffles or french toast. You can also refrigerate leftover and reheat as needed. Leftover syrup will not be quite as frothy, but still delicious.
Recipe Source: Adapted to be sugar free from a recipe shared by Pam, a friend
Just in case you're thrown off by the "coconut". Let me just say that I'm not really a coconut person. I don't really like the texture. But I adore this syrup. It really doesn't even taste like what you would imagine coconut syrup to taste like. It's just deliciousness at it's finest.
And in case you're wondering, this IS the recipe that I alluded to it in a post just a few weeks ago in my post about culturing your own buttermilk. And yes, you do need to use real buttermilk for this, please don't sub that ingredient. One substitution you can make if you're looking to go healthier is using coconut oil instead of butter. I made it last time with coconut oil and raw honey and really couldn't tell much of a difference. If you made some with butter and without and put them side by side, I'd probably say I preferred the one with butter (it's got that yummy buttery flavor), but coconut oil works great and does have some great health benefits.
Can I just beg you to try this recipe? It's one of my favorites and you'll be glad that you did. If you do, I'd love to hear your feedback or any questions or comments. Thanks in advance for sharing; feedback from you is one of the big reasons why I love blogging. Happy cookin'!
This week I'll be linking to some of these link parties.
Tuesday, March 26, 2013
Fresh Peach Syrup (No Sugar)
One of the things that I've missed being sugar-free six days a week is the sweet pancake and waffle toppings that I used to enjoy. But most syrups, jams and jellies are loaded with sugar. I usually eat my waffles or pancakes with unsweetened applesauce, but recently I came up with this peach syrup as a variation that I love.
Fresh Peach Syrup (No Sugar)
Printable Recipe
*Makes about 1 cup
INGREDIENTS:
1 Cup peach puree (I used a blender to puree the peaches) *See Note
2 Tbsp. Xagave nectar
Sprinkle of vanilla powder, optional
*Note: If peaches aren't in season you can use thawed frozen or canned peaches with all the liquid drained off
DIRECTIONS:
Combine ingredients and mix well. Serve on fresh waffles or pancakes. Refrigerate leftover syrup for up to a week.
Recipe Source: healthyfamilycookin.blogspot.com
Here's some of my favorite pancake and waffle recipes to serve this syrup on:
This week I'll be linking to some of these link parties.
Tuesday, March 5, 2013
Best Banana Bread
Isn't it so true that "necessity is the mother of invention"? That's been the case with me as I've started to change my diet to become sugar free six days a week. I've literally been on a rampage to convert a lot of the recipes that I love to eat to be sugar free so that I can still enjoy them. It's been a lot of fun. Today I'm sharing with you a recipe that I've made and loved for a long time, and just recently converted to be sugar free.
This recipe comes from a good friend and roommate of mine in college. She made this ALL the time and every time I make it, it reminds me of that happy time and how good it tasted to us. She called it "Best Banana Bread" and it really is. I've been making it whole grain for several years now, and really, why not? The whole grains found in it make it so delicious and flavorful, not to mention making it healthier. I love it. And I hope you enjoy it too.
Best Banana
Bread
Printable Recipe
*Makes 2 Loaves
INGREDIENTS:
2-1/4 Cups Whole Grain Flour (I use Wonder Flour)
1 tsp. baking powder
Printable Recipe
*Makes 2 Loaves
INGREDIENTS:
2-1/4 Cups Whole Grain Flour (I use Wonder Flour)
1 tsp. baking powder
1 tsp. baking
soda
1/8 tsp. salt
½ Cup butter
1-1/4 Cups sugar (I use 3/4 Cup honey)
1/8 tsp. salt
½ Cup butter
1-1/4 Cups sugar (I use 3/4 Cup honey)
¾ Cup sour milk
(3/4 Cup milk with 1 Tbsp. lemon juice or vinegar)
2 beaten eggs
3 ripe bananas, peeled and mashed
DIRECTIONS:
Preheat oven to 350 F. In medium bowl, mix together dry ingredients. Set aside. In another medium bowl, blend the butter, sugar (or honey) and milk, until creamy. Add the beaten eggs and banana pulp and stir until thoroughly mixed in. Then add the combined dry ingredients and stir until just barely combined. Dollop the batter into 2 greased and floured bread loaf pans. Bake in the center of the oven 45-50 min. Do not overcook. The bread is done when a toothpick poked in the center comes out clean. Cool before slicing.
Recipe Source:
Adapted from a recipe given to me by my friend Lavinia
This week I'll be linking to some of these link parties.
Tuesday, February 12, 2013
Oatmeal-Banana Muffins
Here's another delicious whole-grain, sugar-free recipe for you to try. If you remember from my post last year about oats, oats are really good for helping to lower your cholesterol levels and have been shown to boost immune system response, which is important this time of year with all the sickness going around. Our family loves these oatmeal-banana muffins and they are quick and easy to make. I hope you enjoy them too.

Oatmeal Banana Muffins
Printable Recipe
*Makes 12 muffins
INGREDIENTS:
1-1/2 Cups Quick Oats
1-1/4 Cup Whole Grain Flour (I like to use Wonder Flour or White Wheat Flour)
4 tsp. baking powder
1/4 tsp. salt
1 large ripe banana, peeled and mashed
3/4 Cup milk
1 egg, slightly beaten
1/2 Cup canola oil
2 Tbsp. honey
DIRECTIONS:
Preheat oven to 425 F. In a medium bowl combine quick oats, whole grain flour, baking powder and salt and mix well. In another bowl combine mashed banana, milk, egg, oil, and honey and mix to combine. Make a well in the center of the dry ingredients and pour in the wet ingredients and stir lightly just until the dry ingredients are moistened. Do not over beat or your muffins will be tough and shot through with tunnels. Grease muffin pans or line with crinkly paper cupcake liners. Spoon in the batter until it is divided evenly between the 12 muffin tins. Bake at 425 F for 15 minutes or until the muffins are lightly browned and springy to the touch.
*Note: I like to make a double batch of these when I make them and freeze some for later. We reheat our frozen muffins in the microwave for 30 seconds and they are delicious.
Recipe Source: Adapted from a recipe in the book Eat Better, Live Better

Linking with some of these link parties.
Oatmeal Banana Muffins
Printable Recipe
*Makes 12 muffins
INGREDIENTS:
1-1/2 Cups Quick Oats
1-1/4 Cup Whole Grain Flour (I like to use Wonder Flour or White Wheat Flour)
4 tsp. baking powder
1/4 tsp. salt
1 large ripe banana, peeled and mashed
3/4 Cup milk
1 egg, slightly beaten
1/2 Cup canola oil
2 Tbsp. honey
DIRECTIONS:
Preheat oven to 425 F. In a medium bowl combine quick oats, whole grain flour, baking powder and salt and mix well. In another bowl combine mashed banana, milk, egg, oil, and honey and mix to combine. Make a well in the center of the dry ingredients and pour in the wet ingredients and stir lightly just until the dry ingredients are moistened. Do not over beat or your muffins will be tough and shot through with tunnels. Grease muffin pans or line with crinkly paper cupcake liners. Spoon in the batter until it is divided evenly between the 12 muffin tins. Bake at 425 F for 15 minutes or until the muffins are lightly browned and springy to the touch.
*Note: I like to make a double batch of these when I make them and freeze some for later. We reheat our frozen muffins in the microwave for 30 seconds and they are delicious.

Linking with some of these link parties.
Wednesday, June 27, 2012
Grilled Pepper Jack Sliders
Summer is one of those times of the year that I hate heating the house up to make dinner. I'm always looking for a great recipe that doesn't use the oven during the hot summer months. Today I'm sharing with you a variation of grilled cheese sandwiches that we love! You can make these on your stove top, outdoor grill, or a Panini press. The recipe is simple and there is a lot of room for variation. So put on your creative hats and away we go!
VARIATIONS:
For a complete meal, serve with Cottage Fried Potatoes and fresh fruit!
Grilled Pepper Jack Sliders
*This is a great recipe to use up your
leftover roast beef!
INGREDIENTS:
Wonder Rolls or other bread (*see
note)
Leftover cooked roast beef, sliced
Pepper Jack Cheese, sliced
Butter
DIRECTIONS:
Slice the rolls in half. Butter inside of each half of roll and
place butter-side down on the grill, stovetop, or Panini press. Grill until
slightly brown and crispy. Butter the other side of the roll and then flip so
that the newly-buttered side is down on the grill. Stack on top of the bottom
half of the roll a slice of cheese, then a piece of meat, then another piece of
cheese. Then add the top of the roll and grill until the cheese is melted,
oozing out the sides and slightly brown and crispy. Flip roll if needed. Serve immediately.
*Note: For this recipe you can use any
kind of sandwich bread, hamburger buns, bagels or rolls.
VARIATIONS:
·
Try
Colby jack or Swiss cheese in place of the pepper jack.
·
For a delicious breakfast sandwich, use a cooked egg and a few slices of bacon in place of the roast beef.
·
Try different meats! Use thinly sliced ham, cooked bacon, Canadian bacon,
pepperoni, or leave off the meat for vegetarian.
For a complete meal, serve with Cottage Fried Potatoes and fresh fruit!
Wednesday, March 28, 2012
5 Grain Waffles with Flax Seed
If you haven't noticed by now, I love to include whole grains in my cooking - and the more variety, the better they taste. This recipe combines five whole grains plus flax seed to make delicious, light, and crispy waffles that are full of flavor and taste wonderful. I'll also give you the recipe to make a waffle mix that you can store in the refrigerator, making this recipe even easier!
5 Grain Waffles with Flax Seed {Single Batch}
INGREDIENTS:
DIRECTIONS:
Since it's not often practical to grind up all of those various grains every time you want to make waffles, here's the recipe you can use to make a large batch of waffle mix to keep in the refrigerator and pull out when you want to make a batch.
5 Grain Waffles with Flax Seed {Refrigerator Waffle-Mix}
Printable Recipe
*This large batch will make 6 single batches
*Note: You can use 9 Cups wonder flour in place of the brown rice, barley, and spelt flour
INGREDIENTS:
3 Cups Barley flour
INGREDIENTS:
Caution #1: Make sure to not refill your waffle iron or you'll end up with this...
Caution #2: Make sure to spray your waffle iron really well or your waffles will end up looking like this...
5 Grain Waffles with Flax Seed {Single Batch}
*Serves 5-7
*Note: You can use 1-1/2 C. wonder flour in place of the brown rice, barley, and spelt flour
INGREDIENTS:
1/2 C. Brown rice flour*
1/2 C. Barley flour*
1/4 C. Wheat flour
1 Tbsp. Baking powder
1/2 tsp. Baking soda
1/3 C. Powdered milk
1/2 tsp. salt
2 C. Water
1/2 C. Canola oil
2 Eggs
1 tsp. Vanilla
DIRECTIONS:
Heat waffle iron. Combine dry ingredients in a medium sized mixing bowl and mix until combined. Combine water, oil, eggs and vanilla in large bowl and mix together. Add the dry ingredients to the wet all at once and lightly mix until just barely combined. Then let this mix set for a few minutes to let the baking powder do its thing (IMPORTANT: DO NOT MIX AGAIN!). Grease waffle iron well. Then add the amount recommended by your waffle iron's manufacturer to the waffle iron and cook until golden brown and crispy.
Since it's not often practical to grind up all of those various grains every time you want to make waffles, here's the recipe you can use to make a large batch of waffle mix to keep in the refrigerator and pull out when you want to make a batch.
5 Grain Waffles with Flax Seed {Refrigerator Waffle-Mix}
Printable Recipe
*This large batch will make 6 single batches
INGREDIENTS:
3 Cups Barley flour
3 Cups Brown Rice flour
3 Cups Spelt flour
2-1/2 Cups Oat flour
2-1/2 Cups Wheat flour
1 Cup + 2 Tbsp. Ground flax seed
1/4 Cup + 2 Tbsp. Baking powder
1 Tbsp. Baking soda
1 Tbsp. Salt
2 Cup Powdered milk
DIRECTIONS:
Combine all the ingredients and store in a large container in the refrigerator. I used a 5 qt. plastic ice cream container. Then follow the recipe for a single batch of waffle-mix waffles.
5 Grain Waffles with Flax Seed {Single Batch from Refrigerator Waffle-Mix}
*Serves 5-7
INGREDIENTS:
2 Cup Water
2 Eggs
1/2 Cup Canola oil
1 tsp. Vanilla
3 scant Cups Waffle-Mix (scant means just barely below the cup line)
DIRECTIONS:
Heat waffle iron. Combine water, eggs, canola oil, and vanilla in a large mixing bowl. Mix until eggs are well beaten. Add the 3 scant cups of waffle mix all at once and stir until just barely combined. Then let this mix set for a few minutes to let the baking powder do its thing (IMPORTANT: DO NOT MIX AGAIN!). Grease waffle iron well. Then add the amount recommended by your waffle iron's manufacturer to the waffle iron and cook until golden brown and crispy.
Caution #1: Make sure to not refill your waffle iron or you'll end up with this...
And no those weren't on purpose...hehe...I have a lot of oopsies in my cooking. Just follow those two cautions and yours will turn out great! Enjoy!
Update: And if you've got a reason to celebrate here's a very yummy way to eat these waffles: Spread nutella on the hot waffle, top with strawberries, walnuts (yes, really) and whipped cream! Just look at the picture at the top of this post and see if your mouth doesn't water!
Tuesday, March 20, 2012
How To Make Perfect Hard Boiled Eggs in an Electric Pressure Cooker
Are you looking for a fool-proof method for making hard boiled eggs? Cooking hard boiled eggs in the pressure cooker makes them turn out perfect every time. This method is simple and fast and even farm fresh eggs come out easy to crack, which is hard to achieve on the stove top.
Hard boiled eggs are fun to make any time of the year for a snack, brunch, breakfast or lunch. Here's a video clip that I created about how to make hard boiled eggs in an electric pressure cooker, but this method works just as well on a stove top pressure cooker.
Decorating eggs for Easter is a fun, inexpensive and enjoyable activity to do with your family. If you're making hard boiled eggs for Easter, here's some cute and fun designs you might like to try.
Easter Egg Coloring Tips, Dye & Design
Easter Eggs Decorating Ideas for Kids
A collection of Easter Egg Decorating Ideas that Kids will love
Nine Unique Easter Egg Decorating Ideas
20 Easter Egg Decorating Ideas
Decorating Easter Eggs
Easter Egg Decorating For Kids
Wednesday, February 29, 2012
Toasty Banana Nut Muffins
Today I'm sharing a toasty little recipe for Banana Nut Muffins. This recipe is tasty, filling and made healthier by Wonder Flour. If you don't want to use wonder flour, you can try it with white flour or wheat flour and I'm sure it would also be tasty.
Banana Nut Muffins
*Makes 24 muffins
INGREDIENTS:
1 tsp. baking powder
1/8 tsp. salt
1 tsp. baking soda
1/2 Cup butter
1-1/4 Cup sugar
3/4 Cup sour milk (milk mixed with 1 Tbsp.
lemon juice)
2 eggs
3 ripe bananas
sliced almonds as a topping, optional
DIRECTIONS:
Preheat oven to 350. Spray 24 muffin tins
with oil.
In a small mixing bowl, combine the dry
ingredients: flour, baking powder, salt, and baking soda. In a separate medium
sized bowl, cream the butter and sugar together using an electric beater. Then
add the sour milk to the butter/sugar mixture and mix. Then add the 2 eggs and
3 ripe bananas and mix until smooth. Combine the wet and dry ingredients and
mix until combined. Stir in roasted slivered almonds if desired.
Scoop out about 1/4 C of the batter into
each muffin tin. Sprinkle with sliced almonds, if desired. Bake at 350 for
25-30 minutes or until golden brown.
Thursday, February 2, 2012
The Queen of Hearts, she made some tarts
The Queen of Hearts
She made some tarts,
All on a winter's day;
The Knave of Hearts
He stole those tarts,
And took them clean away.
The King of Hearts
Called for the tarts,
And gave the knave a chore;
The Knave of Hearts
Brought back the tarts,
And vowed he'd steal no more.
Well in honor of valentine's day this month, I made some yummy homemade pop tarts. They are healthier than the store-bought kind, but still not super healthy. Don't you think they are cute?
The kids and I had fun making them together. They are really easy! Here's what you do...
Next place some of your favorite jam on one heart - I made some with blackberry, peach and pear and all were delicious! The pear was Brandon's favorite. It was too hard for me to pick one - I liked them all!
Next. put another heart dough on top of the first.
Or this, if you want to be creative like my son Curious George!
Continue until you have a whole pan of them. Place the tarts on parchment paper on a cookie tray.
Brush with egg wash and sprinkle with red sugar or leave off if you want to frost them after baking.
Then bake them in a preheated 375 F oven for 15-20 minutes or until slightly brown. Let them cool on a cookie rack and then frost some with glaze if desired.
Homemade Pop Tarts
Pie crust for 2 pies, refrigerated or homemade (see my recipe below).
Jam - Any kind you like!
1 egg
Red Sugar or Glaze (see recipe below)
Preheat oven to 375 F. Flour your breadboard or counter and rolling pin. Form 1 pie crust dough into a ball and place on floured cutting board or counter. Tuck the ends under to make a smooth ball. Roll out into a circle. Cut out tart shapes with cookie cutters (any shape you like). Place 1-2 tsp. jam in the center and top with another cut-out pastry shape. Crimp edges with a fork. Repeat until all the pie crust is used.
Place tarts on a parchment-lined cookie sheet. Brush with egg wash (whisk 1 egg with 1 Tbsp. water). Sprinkle some with red sugar or don't if you want to glaze them later.
Bake the pop-tarts for about 15-20 minutes in the preheated oven, or until slightly brown. Let them cool on a cookie rack and then frost some with glaze (see recipe below) if desired. Perfect to eat fresh or freeze them and pop into a toaster for a yummy breakfast. Makes 1 dozen tarts.
Pie Crust
Ingredients:
2 C. all-purpose white flour
1 tsp. salt
1/2 C. ice water
1 C. shortening
Mix together flour and salt and place 1/2 cup of this mix in a cup and set aside.
Add 1/4 C. shortening (or butter-flavored shortening) to the remaining flour and cut into small balls with 2 knives or a pastry cutter. Do not handle this with your hands until the very last because the heat from your hands will make the dough tough.
Add the ice water to the mix you set aside and mix it to make a paste. Add this past to the flour and crisco and cut in well.
Glaze Powdered sugar (start with 1/2 - 1 cup)
splash of vanilla
milk, as needed
Place powdered sugar in a bowl. Add vanilla and add milk until glaze is spreadable but still thick. Add food coloring if desired.
Linked to It's a Keeper Thursday, What's cooking Thursday, Full Plate Thursday, Tasty Tuesdays, Cast Party Wednesday, Tuesdays Tasty Tidbits, Baking, What I Whipped Up Wednesday, Sweet Temptations, Tastetastic Thursday, Just Something I whipped Up, See You in the Gumbo
Wednesday, February 1, 2012
Oat Recipes
Here's some of my favorite recipes that I've posted using oats.
Honey Oat Wheat Bread
Mouthwatering Whole-grain Oat Bread
No Sugar Oatmeal Breakfast Cereal
No-Sugar Granola
Holiday Granola
Pumpkin Oatmeal Cookies
My Favorite Granola & Peanut Butter Granola Bars
Today I have another recipe for oatmeal to share that I need to give my husband credit for. He made this for me one morning as a special treat and I knew I needed to share it! It was delicious!

Brandon's Pecan Coconut Oatmeal Breakfast Cereal
Here's what you do:
Put 1/4 C quick oats in a bowl. Add milk until barely not covering oats. Cook in microwave for 1.5 - 2 minutes. When it comes out, the oats should be soft and thick.
Then add:
1/4 tsp. vanilla
1 Tbsp. coconut oil
1/2 - 2 Tbsp. Xagave
1-2 Tbsp. chopped pecans
1 Tbsp. coconut
1-2 Tbsp. white chocolate chips, optional
Eat up and enjoy! I listed the white chocolate chips as optional simply because this is a healthy food blog...but but they really are good in it! I highly recommend them! Yes, you feel like you're eating a oatmeal chocolate chip cookie for breakfast...every once and a while it's okay...yum!!
Here's some of my favorite oat recipes from pinterest!
Linked to Friday Favorite Finds
Honey Oat Wheat Bread
Mouthwatering Whole-grain Oat Bread
No Sugar Oatmeal Breakfast Cereal
No-Sugar Granola
Holiday Granola
Pumpkin Oatmeal Cookies
My Favorite Granola & Peanut Butter Granola Bars
Today I have another recipe for oatmeal to share that I need to give my husband credit for. He made this for me one morning as a special treat and I knew I needed to share it! It was delicious!
Brandon's Pecan Coconut Oatmeal Breakfast Cereal
Here's what you do:
Put 1/4 C quick oats in a bowl. Add milk until barely not covering oats. Cook in microwave for 1.5 - 2 minutes. When it comes out, the oats should be soft and thick.
Then add:
1/4 tsp. vanilla
1 Tbsp. coconut oil
1/2 - 2 Tbsp. Xagave
1-2 Tbsp. chopped pecans
1 Tbsp. coconut
1-2 Tbsp. white chocolate chips, optional
Eat up and enjoy! I listed the white chocolate chips as optional simply because this is a healthy food blog...but but they really are good in it! I highly recommend them! Yes, you feel like you're eating a oatmeal chocolate chip cookie for breakfast...every once and a while it's okay...yum!!
Here's some of my favorite oat recipes from pinterest!
Meatless Chicken Fried Steak (with Oatmeal)
No Bake Energy Bites
Homemade Chewy Granola Bars without Corn Syrup
Chocolate, Oatmeal Banana Shake
Raspberry/Blackberry Oat Breakfast Bars
Ginger Berry and Oat Smoothie
Oatmeal Cream Pies
Chewy Oatmeal Fudge Bars
Linked to Friday Favorite Finds
Subscribe to:
Posts (Atom)
Popular Posts
-
Here's another great recipe for your electric pressure cooker. We made these baked potatoes tonight and they are really easy to make. I ...
-
Did you know that just like popcorn, quinoa can be popped? Well it can! And here's proof: Are you surprised by the picture? Did you...
-
I discovered a secret that I really shouldn't have. Because, let me tell you, It's Dangerous! Here's my disclaimer: There a...
-
This recipe is comfort food at it's best! Perfect for a cold, winter day. If you're not feeling well, it is the cure - it really is...
-
My sister asked me what some of my favorite pressure cooker recipes are. She just got one of these Cuisinart electric pressure cookers. You ...