Friday, June 29, 2012

Frugal Friday: Understanding Amortization, Part II

A few months ago I shared with you my experience with debt. Then in a later post, I talked about amortization and how to use an amortization schedule to help you get out of debt. Today I want to come back to this topic and discuss it more because I have more to share.

A quote attributed to Carlyle says, "Debt is a bottomless sea." And I can certainly relate to that feeling, can't you? When you're in debt it's hard to see the way out of it. You think it will last forever! And it can, if you're not actively trying to get out.


One of the most important things that we have done to get out of debt was to set goals. Reachable goals, but goals that stretched us and made things a little uncomfortable for a while. We decided that until we got out of debt, we focus as much as we could on buying only necessities and put our excess income towards paying off our debt (our house in this case).

We sat down with an amortization schedule and mapped out how soon we could feasibly get out of debt with our current income. By adjusting numbers and plugging them into the amortization schedule, we were amazed at what a difference putting even a couple hundred dollars a month extra toward our loans could make. We discovered that we could cut our debt time to half or even a third or a quarter of the term of the loan by simply paying extra on our principal each month.

As I mentioned before, it's important not to wait to do this. It's easy to think, "I'll just save the money and pay off the loan in one big lump sum at the end." But you have to understand the way amortization works is that the most critical time to save money on your loan is right up front at the beginning of the loan. That's where it really makes a difference. Let me see if I can explain using a theoretical example.

In this example I'm using the downloadable amortization calculator from this site, but you can use any amortization calculator that you like. Here's an screenshot of a theoretical 30-year loan amortization schedule for a loan of $200,000. The annual interest rate is 5%. This screenshot shows no additional principal payments - just a monthly payment of $1,073.64. This example will be the base point for my next four examples.


EXAMPLE 1: Extra $100/month for the lifetime of your loan

Now in this next screenshot, I'm showing what will happen if you take the same loan and now pay an additional $100/month right from the beginning toward the principal. As you can see, you will save $37,069.03 in interest by doing this and will cut your loan time by over 5 years, which is significant! Putting more towards your loan every month, obviously will save you even more and reduce the amount of time you will be in debt.


EXAMPLE 2: Paying it off at the end

Now imagine that instead of putting that $100 toward your principal payment each month, you put it in the bank and decided you would use that money to pay off your home at the very end. In the previous example, you would have put a total of $29,700 toward your house extra principal over the course of the 25 years. So if we put that much in the bank and pay it off at the very end, here's what we come up with. You are only saving $13,527.76 in interest this example, by putting roughly the same amount of money towards your house as in the previous example. Just at the end instead of steadily throughout the life of your loan. You can see that this really does make a difference. While you may be able to generate a little bit of interest on the money you put in the bank, it will no where compare with the amount of money you can save yourself, by putting a little towards your loan every month from the very beginning. Note that this also only cuts your loan time by about 3 years instead of 5 with the same amount of money.


EXAMPLE 3: Extra $200/month at the end of the loan

In this next screenshot, I've started after 170 payments to put $200 toward the principal. This is the example where maybe you don't think you can afford to put any money up front, but try to make up for it at the end. You are putting roughly the same amount of money as the other two examples (about $29,700 total). As you can see this saves $15,190.85 in interest. And cuts your loan by 4.5 years. While you are out of debt at roughly the same time as example 1, you save less than half the interest by paying it off at the end instead of consistently throughout the lifetime of your loan.


EXAMPLE 4: Extra $200/month for the first half of the loan

In case I haven't convinced you yet, I'll share one more example. In this example, I'll put the same amount of money toward the loan (about $29,700 total), but pay $200/month for the first part of the loan and then stop paying any extra for the rest of the loan. As you can see, this example saves the most in interest of $54,102. And you've cut your loan by 6.5 years. We could extend this to show that the more you put up front will make more of a difference to saving you money than the total amount extra that you spend.


Hopefully through these examples, you are getting a sense for how amortization really works and how you can use it to help your family get out of debt and save money. Knowing this information and applying it to your own debt can literally save your family thousands of dollars in interest. Remember, healthy families are financially healthy as well as physically healthy!

I'd love to hear any ideas or comments about your families experience with debt or how you save money. Thanks and have a wonderful day!


Linked to: Frugal Friday, Thrifty Thursday, Homemaking Linkup, Hearts 4 Home

Wednesday, June 27, 2012

Grilled Pepper Jack Sliders

Summer is one of those times of the year that I hate heating the house up to make dinner. I'm always looking for a great recipe that doesn't use the oven during the hot summer months. Today I'm sharing with you a variation of grilled cheese sandwiches that we love! You can make these on your stove top, outdoor grill, or a Panini press. The recipe is simple and there is a lot of room for variation. So put on your creative hats and away we go!


Grilled Pepper Jack Sliders

*This is a great recipe to use up your leftover roast beef!

INGREDIENTS:
Wonder Rolls or other bread (*see note)
Leftover cooked roast beef, sliced
Pepper Jack Cheese, sliced
Butter

DIRECTIONS:
Slice the rolls in half. Butter inside of each half of roll and place butter-side down on the grill, stovetop, or Panini press. Grill until slightly brown and crispy. Butter the other side of the roll and then flip so that the newly-buttered side is down on the grill. Stack on top of the bottom half of the roll a slice of cheese, then a piece of meat, then another piece of cheese. Then add the top of the roll and grill until the cheese is melted, oozing out the sides and slightly brown and crispy. Flip roll if needed. Serve immediately.

*Note: For this recipe you can use any kind of sandwich bread, hamburger buns, bagels or rolls.


VARIATIONS:
·        Try Colby jack or Swiss cheese in place of the pepper jack.

·        For a delicious breakfast sandwich, use a cooked egg and a few slices of bacon in place of the roast beef.

·         Try different meats! Use thinly sliced ham, cooked bacon, Canadian bacon, pepperoni, or leave off the meat for vegetarian.


For a complete meal, serve with Cottage Fried Potatoes and fresh fruit!

Friday, June 22, 2012

Frugal Friday: Menu Planning

A lot of summer talk around here lately! Last week I shared with your our plan for summer, including a free printable weekly summer calendar where you can plan out your activities. Planning your activities really helps you save money and stick within a budget. To help you find frugal activities, I shared over 100 ideas for frugal family activities for summer. And today I want to help you with the second tip that I shared for keeping your family's summer on a budget, but it works for any time of the year!


2. Plan your meals

Meal planning is a great way to save money, save time, eat healthier, and keep family dinner time a priority in your home. By planning ahead you can save money by planning meals based on what goes on sale in the store, what you have in your pantry, or what you have in your garden. With a plan in place, you will eat out less and make fewer trips to the store, thus saving money and time. Planning ahead helps to ensure that your family is getting balanced, healthy meals. 


Today I want to share with you the way we plan our meals to save money and time. 

BREAKFAST
Breakfasts around here tend to be spontaneous and flexible. For special occasions, I plan bigger or fancier breakfasts, but usually we just eat the following:

  • Sugar-free Oatmeal - this is our standby breakfast that we have 2 or 3 times every week. It is fast, easy, and healthy. I love it when we have fresh fruit around from our garden because it makes it even better!
  • Smoothies - We love to make smoothies for breakfast. We've been trying all kinds lately with all the fresh greens that we have growing in our garden. Here's a green smoothie formula that we use a lot. 
  • Yogurt & Granola - We love to eat homemade yogurt and this granola, especially in the spring and summer. Sometimes we add fresh fruit or jam to make it even tastier!

LUNCH
Lunches for us are usually leftovers, freezer burritos, sandwiches, or the like. I love simple, low hassle lunches. When we are running around, I make sure we have things in the freezer to pull out for on-the-go lunches or snacks.

DINNER
I am a huge advocate of family dinner time. I think it's so important to sit together with your family at the end of the day and enjoy a delicious meal together and each other's company. Family meals help you create a healthy family. The biggest roadblock to having dinner with your family is knowing what to make. In fact, I think dinners are the most challenging part of meal planning. I love the food nanny's approach to planning dinner with a theme-night each week. Here's the menu plan that I use that you can download at the link below.


You can either keep a consistent them for each night every week or you can switch it around a bit. We do a little of both. We usually have 3 or 4 nights that are a consistent theme and the rest we switch around to adapt to our activities for the week. 

Here's an example of some meal themes that we use.

Monday: Mexican
Tuesday: Fish/Meatless
Wednesday: Leftovers
Thursday: Italian
Friday: Pizza
Saturday: Grill/Meat
Sunday: Comfort Food/Traditional

Other themes ideas include: Soup, Breakfast, Asian, Favorites, Picnic, Fiesta, Cultural, etc. Be creative and make it fun! What kinds of food does your family love? Use those to set your theme nights.

After you pick the theme, you select dinner recipes that fit within that theme and your budget. As you plan your menus, you write the ingredients for the meals that you need at the grocery store (that you don't have already in your pantry or freezer). One of the reasons I love this plan is that I only need to go grocery shopping every two weeks. Sometimes I do have to do a quick run to pick up perishable items one more time, but often I can plan so that I don't (especially when our garden is in season). Having only one main shopping trip every two weeks saves me a lot of time and money.

In the future, I will be sharing with you some of our family's favorite meal plans. But for now I hope that gives you something to get started with in planning your family's meals. 

Have you tried meal planning? What has worked or not worked for you? What are some of your family's favorite meals?

Wednesday, June 20, 2012

Refreshing Pineapple-Basil-ade

Are you loving summer? Keeping cool enough? Brandon has been going crazing with making green, refreshing drinks this summer. He's experimented with tons of different combinations that are so good! Unfortunately, he's known for not following a recipe and not writing down his recipes, so most of the time I can't replicate them...but...yesterday I followed him around while he made this one. I wrote down the ingredients so I could share it for you to enjoy too! YUM! It is definitely a winner. I'm calling it Pineapple-Basil-ade! Enjoy!


Pineapple-Basil-ade
Printable Recipe

*Serves 3-4

INGREDIENTS:
2 Cups Water
1/8 Cup fresh basil (must be fresh!)
1-1/2 tsp. fresh ginger root, chopped
1 20-oz. can of undrained pineapple (any style) *see note
1/4 - 1/2 Cup white sugar, to taste (or use alternative sweetener)
2 Cups ice

*Note: If you want to give yourself an even better treat, use 1/2 of a fresh pineapple, peeled and roughly chopped, plus the pineapple core.  

DIRECTIONS:
In a large, high-powered blender, combine the water, basil, fresh ginger root and pineapple and blend well. Add the white sugar (or alternative sweetener) to taste and puree well. Add the ice and blend for a couple of minutes until smooth and frothy. Serve immediately and enjoy immensely!

Variation:
If you add a handful of spinach or chard in the blender first and blend it up with the first ingredients, it adds nutrition, doesn't compromise flavor, makes it a little greener, and it's REALLY good!

Friday, June 15, 2012

Frugal Friday: Summer Plan

My last two Frugal Friday posts have been all about summer! Two weeks ago I shared More than 100 Frugal Summer Family Activities and last week I gave you some tips about Keeping Summer on a Budget.

Today I will talk more about the first important step in keeping summer in a budget: 

1. Plan your Activities 

Remember that having a plan for your summer activities will help you keep within your budget. If you plan the activities ahead of time (making sure to include a lot of frugal activities from my list I shared), you will be able to pick only the activities that cost what you have in your budget to spend. 

I mentioned a little about our summer plan in the last post. Each day of the week, we have a different theme. When the kids finish their chores and assignments, then we get to do the activities that go with the theme for the day, which we pick ahead of time. 

I've found that along with saving money, planning our activities ahead of time gives the kids a great incentive to get their chores done. While everyone loves a lazy summer day once and a while, let's be honest and admit that it does get pretty old to sit around the house in your pajamas all day accomplishing nothing. Kids are no different. They want to accomplish. They want to do good. They want to contribute. We can help them by giving them the responsibility of chores and the incentive that when they finish them, they get to do the activity AND they get to have the rest of the day as "free time!" 

Before I present our summer plan, let me just take a moment to say that I believe in having a lot of "free time" for kids. Especially in the summer! Planning a scheduled fun activity during the day is one thing. Having a packed schedule with no "free time" is quite another. The first one allows structure, flexibility, creativity, and imagination. The second is just overwhelming and exhausting and defeats the purpose of a summer in the first place! So avoid the tendency of filling up your calendar with "stuff to do". Even good stuff to do! Pick an activity each day and then let the kids have "free time" to just be kids the rest of the time. 

That being said, here's our family's summer plan!


As you can see, I have themes for each weekday at the top. Under the chores I list each child and their chore for the day. Then under "Activities" I list the activity that we have planned that goes along with the theme and any other family or other things going on for that day (baseball games, piano lessons, etc). In the top left corner I have a place where we list the chores that the kids can do to earn money and the dollar amount per chore. The money chores have to be done after the regular chores, and no, the regular chores at our house aren't paid. They are just chores because we all do chores to help out. I hope this makes sense. Let me know if you have any questions or I'd love to hear ideas that you use to plan your summer!

I hope you have a wonderful day and a wonderful summer with your family.

Linked to: Frugal Friday, Hearts 4 Home, Thrifty Thursday

Tuesday, June 12, 2012

French Bread Subs

I love picnics! And one of my favorite things to bring on picnics is French Bread sandwiches. Growing up these are what we called "subway sandwiches". And I had no idea until I was older that a "subway sandwich" was anything else. :)

This recipe was discovered because I was looking for a way to freeze French Bread for picnics so that I wouldn't always have to go to the store every time we wanted to have a French Bread sandwich. As you know French Bread usually comes in really long loaves that don't fit in regular sized freezer bags. I thought about just buying the big loaves and then cutting it to fit in the bags and freeze...but what I really wanted was a recipe that was healthier and tastier than the French Bread that you buy in the store.  Then I thought about making the French Bread and then cutting it to fit in the bags and freeze...and then I thought, Why not just make smaller loaves that will fit in the bags in the first place? And so I did! And these delicious, crusty French Bread subs came about. Now I'm so excited because my freezer is stocked with them so I can have a picnic whenever I want! 

French Bread Subs

*Makes six 6"subs

INGREDIENTS:
2 Cups hot water ( >110° F)
1 Cup sour dough starter
2 Tbsp. oil
1 Tbsp. white sugar
2 tsp. salt
2 Cups wheat flour, freshly ground white wheat
2 Tbsp. Instant yeast
2-4 Cups White Flour

DIRECTIONS:
Preheat oven to 400° F. Place a metal pan with 2” of water in the bottom of the oven to create steam when the bread is baking. This gives the bread a nice crispy texture. Prepare a cookie sheet or jelly roll pan with semolina flour sprinkled on top or use parchment paper.

The easiest method of making this recipe is to use a stand mixer with a dough hook attachment.  Start with the mixer off. To the bowl of the mixer, combine water, sour dough starter, oil, white sugar, and salt. Next add the whole wheat flour and the yeast on the very top. Now turn the mixer on, and start adding white flour, a half cup at a time until the dough cleans the sides of the mixer bowl. Then let the mixer mix the dough for 6 minutes. Letting the dough mix will develop the gluten in the dough so that it will stick together and give a nice texture to the bread.

Once the dough is kneaded, turn off the mixer and divide the dough into 6 pieces. Roll and shape each piece into a 6” long sub. Then place the subs on the prepared pan. Let the subs rise until double. Once the subs have risen, bake in the preheated oven for 5 minutes at 400° F. Then drop the temperature to 350° F and bake for an additional 15-20 minutes or until the subs are golden brown and crusty. Remove from the oven and let the subs cool. Makes a delicious sandwich bread!

*This recipe freezes well. I like to double the recipe and keep them in my freezer for a spontaneous picnic.

Recipe Source: healthyfamilycookin.blogspot.com

Saturday, June 9, 2012

Favorite Children's Book: I Wonder Why The Wind Blows

I haven't highlighted any non-fiction books up to this point in my book spotlights until now. But there are some great ones! And I think it's important to include non-fiction books in our children's book repertoire. I love the "I Wonder Why" Series. This particular book (why the wind blows) is by Anita Goneri, but others in the series are written by other authors.


The books are bright and colorful and address real questions that most children have or are interested in about the world around them. Questions like, "What is thunder?", "How high is the sky?", and "Which is the coldest place in the world?". These books are perfect for younger children because there's not a whole lot of detail in answering the questions - maybe one or two sentences, yet they satisfy their curiosity. And older kids love the fact that they can read them by themselves and tell you all these facts that they think you don't know (and often they are right!). If you're looking for some good non-fiction children's books to check out at your library or add to your collection, the "I Wonder Why" books are a great option!

Friday, June 8, 2012

Frugal Friday: Keeping Summer on a Budget

Last week in my Frugal Friday post, I listed more than 100 frugal activities that you can do with your family this summer. I'm happy to report that we've already done several on the list and our summer is going great! We've enjoyed washing the cars and bikes, washing the windows, having water fights, making a volcano (we made it out of popcorn), planting a garden (oh by the way did you take my virtual garden tour?), going on picnics, going to the splash pad, etc.

How about you? Have you had any fun adventures?

One thing I've noticed about having the kids home from school all day and the weather so nice is how easy it is to spend money: a trip to the pool, a night out for pizza, a movie here or a Big Gulp there. Frittering away at the budget until it's overspent is so easy to do when there's so much to do! So here's some ideas to help you keep your summer activities within budget.
1. Plan your activities
Planning really is key when you're trying to stick to a budget. While I love spontaneity (and we have a lot of it in our house), often those spontaneous things end up costing an arm and a leg. I've found that one way to minimize spontaneity without stifling it is to plan the activities where you spend money ahead of time. Set a limit for how many of those you will do this summer and let the kids help pick what they want to do (within a given budget). It's a great way to involve them and to teach them about money. When they get a little older, let them help save up for the activities that they want to do. Then to make life more interesting, throw in spontaneous, frugal activities from the list I shared last week. That way you get the best of both worlds; you stick to your budget and you get the thrill of a spontaneous adventure at the same time.

In our family this year I decided to try a new approach to planning our summer activities. Each day my kids have chores, reading and piano practicing to do. As an incentive to get these things done, we set up an activity to do each day. Most of these activities cost nothing - we use a lot of the activities on the summer activity list I shared last week. Today I want to share a way that I've found to organize the activities and have some consistency that your kids can look forward to.

  • Make Something Monday - We make a craft, project, snack or treat.
  • Library Trip Tuesday  - We go to the library, check out books and sometimes go to story time.
  • Wet, Wet, Wednesday - We run through the sprinklers, wash the cars or bikes, make bubbles or do another wet activity.
  • Thinking Thursday - We do an activity that helps us learn - a science project, learn some words from another language, have a read-a-thon or another learning activity.
  • Field Trip Friday - We go on a field trip somewhere - to the park, to the zoo, to the swimming pool or splash pad. Some cost money, some are free. We plan them ahead of time so everyone knows what to expect.

2. Plan your meals
Food costs is one of those things that seems to get higher as summertime approaches. BBQ season often means more costly meat purchases. Snow cone and ice cream vendors around every corner are tempting in the stifling heat. And of course the busy-ness means less time for food at home and more likelihood of eating out. One of the things that I've learned is that planning your meals ahead of time increases the chance that you will eat healthier food and spend less money. I love the idea of having a theme for each night of the week. Our kids look forward to Pizza night on Friday night where we make homemade pizza and watch a movie together. They love Thursdays when they get trade off in picking a meal for Mom to make (and them to help). I'll be honest and tell you their least favorite night is Leftover night on Wednesday, but they're good sports about it most of the time. On Saturday, Daddy gets to cook whatever he wants and that's always a fun surprise. The other days we alternate themes a bit: Comfort Food, Italian, Fish/Meatless, Breakfast, Mexican, Asian Food, etc. I plan meals two weeks at a time and because of this, I shop a lot less often (which also saves me money). I could go on and on about meal planning (and perhaps I will in another post). But for today I'll just say, plan your meals! It may take a bit of time up front, but it saves time and money in the long run.

3. Set a $ limit
We went to the carnival the other day and I found when we got there that I had only brought $10 cash. And of course everything was cash only. But it actually worked out great because when I ran out of money, the party was over and we went home. And we had a great time and found that we could stretch $10 quite a long way. By setting a spending limit for your activities, it not only helps you stick to your budget, but it also forces you to be creative and enjoy doing more than just things that cost money. It helps you enjoy the time together just being together.

I hope those ideas help you plan a great summer with your family and to stay in budget while you do! I'd love to hear about your ideas and tips for how your family keeps summer on a budget.

Linked to: Frugal Friday, Homemaking Linkup, Hearts 4 Home, Thrifty Thursday

Tuesday, June 5, 2012

Garden Tour

For the last couple of weeks, you may have noticed that I've been a bit sparse....And I think it may continue for a while. For me this time of year is always so hard to balance. Material-wise, it's my favorite time of year to blog! I've got so many new recipe ideas and new garden tips and tricks and things I'm learning. But at the same time, there is SOOOO much work to do in the garden and yard and with kids for the summer that there's never enough time for everything... So that's my dilemma. So if you're wondering where I went, just know that I'm still here - probably out in the yard or playing with the kids or making something really yummy to eat...And the recipes and ideas WILL get posted, just maybe not immediately.

That being said, today I'm making up for my sparseness with a very LOOONG post with tons of pictures. I'd like to welcome you to my Garden Tour!


We have made a lot of improvements to the yard that are so much fun (one of the reasons I've been so sparce). Today I'm excited to share with you how we've beautified our yard and maybe it will give you some ideas for your own!
Strawberry Beds
Our first outdoor project this year was fixing up these strawberry beds. Where we live, we have a problem with deer or quail eating the strawberries so we have to cover them. Not to mention children stepping on them...If you've been reading my posts on this blog and on facebook, you may have seen some sneak preview pictures of our new strawberry cages.

I used some wooden stakes (from Home Depot) to stake up the white wire fences around the beds. The little fences came with stakes of their own but I wanted them to be a little sturdier (as I mentioned, I have kids accidentally tripping over my beds all the time). Then I spread fruit netting over the top. I used to have chicken wire but I LOVE the bird netting so much more. It doesn't poke you when you're trying to pick or weed underneath. I just tied mine to the wire fences with wire twisty ties that I can remove when I want to weed or pick underneath.


The picture above was taken when we had a lot of blooms on our plants....But the picture below was taken today and as you can see our strawberries are now in season! We picked 2 1/2 quarts this morning to freeze. And that doesn't count the dozens of other ones the kids have been finding to munch on when they're outside.


Edible Landscaping
The next project that I've been working on is to create an edible, perennial, herb and flower garden off the patio, adjacent to the strawberries. As you can see, we have parsley growing along the path between the strawberry beds. The kids love to go out there and eat the parsley plain as they are picking strawberries. We have onions behind the berries. Since onions are bulbs, they are perennial, coming back every year. In the later summer they actually create blooms on the top that are quite pretty. We have a huge oregano patch that you can see in the picture below. It loves to take over things so be careful if you plant it. Also there are potatoes that we've planted in the location in the picture because they get watered. They will be harvested in the fall and we'll replant them next year.


I'm including the picture below so you can kind of get perspective for the next few pictures. This is just another view of what I showed above. You can see the edge of the patio.

The picture below shows a view that is wrapping around to the other end of the patio from the previous picture. The big leafy plant in most of this picture is Bishop's weed, that was here when we first bought the home. It's very pretty and I love it, but it needs to be controlled because it likes to take over. So this year I put a little barrier fence around it (can't see in the picture) and planted the other herbs, berries and flowers that I wanted around it and in pots around it. 

All of the plants listed in these pictures are edible. I did some research on perennial herbs and flowers so I won't have as much replanting to do every year in this section of our yard. The only exception to the perennial plants is the basil...that I know I will have to replant next year. As you can see I have more space in between the plants. I saved some room to see how they expand and fill in. But I have some more edible plants that I'd like to eventually get to grow in this area as well.


Another thing that we like to plant off the patio (between the two main strawberry beds in the first picture) is radishes. Radishes are the perfect kid plant because they grow so quickly! About a month after you plant them you can start harvesting them, which is perfect. Our kids love to go out there and pick "their radishes". Some kids like them and some don't - J loves them, but C doesn't want anything to do with them once he picks them! For me they taste best in a salad, or plain if you eat them when they are very young and tender (before they get too hot). As you can see, ours have already gone to seed in the picture below, but they make pretty flowers, even if you decide not to eat them all.


Grape and Rose Arbor
We planted these grapes alongside our fence about three years ago now and they are doing great! 

This year they even are starting to produce grapes! :)


A couple of years we had the idea to do a grape arbor in the entry way to our back-backyard and to our main garden area. We planted the grapes from clippings that my dad gave me and only one of them survived the transplant. We never got to build the arbor, due to other things that came up. But finally this year we started building the arbor and decided to make it a grape and rose arbor. The roses are climbing roses that theoretically will climb to the top of the arbor. It's not done yet, but here's what we did.

We bought six 4"x4"x10' pressure treated wooden beams and put tar on the base. We dug 4 holes where we wanted to put the arbor and leveled the ground around it. Then we connected the beams together with metal brackets. We thought it would be a pain to level the arbor, but somehow (and we're really not sure how), it came together almost perfectly the first time. We only spent about 30 minutes leveling (and a lot of that unnecessarily), which really is amazing. 

Here's Brandon working on the arbor:

Since we didn't cement the beams into the ground, we decided to build a little planter box around the base on one side and smaller planter boxes on the other to give it a bit more character (and support). These are where we're planting the roses and grapes. And of course, we had to have a bench to enjoy the garden in! We could have made one, but I liked this one...

And here's the finished product! WELL...Actually it's not really finished. Notice the carpet at the bottom and the black tar sticking out on one side (where i haven't finished planting...) And eventually there will be beams across the top when the plants get up past the poles where they can branch out...But that's not all going to happen this year (except the planting...). We have to take things is steps around here!


Main Garden
Now if you'll come with me through the arbor, I'll show you what's growing in the main garden right now! 

Cold Weather Garden (shallow rooting plants)
We planted our cold weather garden at the beginning of March this year. We've been harvesting from it for a couple of months now. Onions (won't be ready until Fall), Spinach, Lettuce, Chard, Cabbage, Turnips (we've been eating the greens in our green smoothies - yum!), and peas. We water these plants twice a week for about 30-45 minutes.


Immature Fruit Crops (medium-rooting crops)
These are crops that are medium rooting. We planted them around mother's day this year. We water them with a soaker hose for about an hour. The white stuff on the plants is there because we have little bugs eat our plants. I sprinkle them with Seven Dust after they pop through the ground for a few weeks after they pop through the soil and that seems to help until they get established. 

I bought the pepper plants shown here from a local nursery - we have about 24 peppers planted, 6 different varieties.

Potatoes - this is a great year for potatoes around here! We planted them back at the beginning of April and they are getting big! We planted some Russets and Yukon Gold varieties that we bought at our local nursery. I'm trying something new on some of the plants. I'm putting buckets (actually tree pots with the bottom cut out) around them and filling them with dirt. I'm hoping that will help the roots go higher, thus increasing our yield! We'll see...

This year I'm trying something new with the scarlet runner beans. I built a teepee out of 7 6" long garden stakes. I covered the bottoms with dirt and planted two runner beans near each pole. I'm excited to see how they do!


We planted two batches of corn this year. One batch we planted around mother's day and the other 2 weeks later. That will hopefully help spread our harvest out over a longer period of time in the fall.


They're not pictured here, but we also have zucchini, yellow summer squash and two kinds of cucumbers.

Warm Weather Crops
These are deep-rooted warm weather crops that I water every two weeks for 3-4 hours. The roots run deep so it's important to give them a good, long soaking to get their roots nice and established.

We love to plant winter squash, it's a wonderful vegetable to grow and store because it keeps for up to 6 months or more. In fact we still have one spaghetti squash left from last year's harvest! This year we planted Hubbard Squash, Pumpkin, Sunshine Squash, Butternut and Acorn Squash.

We planted 28 tomatoes of 10 different varieties that we bought from a local nursery. We like to cover the tomatoes with black plastic and this year we put carpet down in between the rows to keep even less weeds down.

One of our favorite things from the garden is the melons. This year we planted Cantalope, Crenshaw, and Honey Dew melon. I started the seeds a few weeks in pots and transplanted them in the ground after Mother's Day. We put black plastic down for the melons also to keep the weeds down.

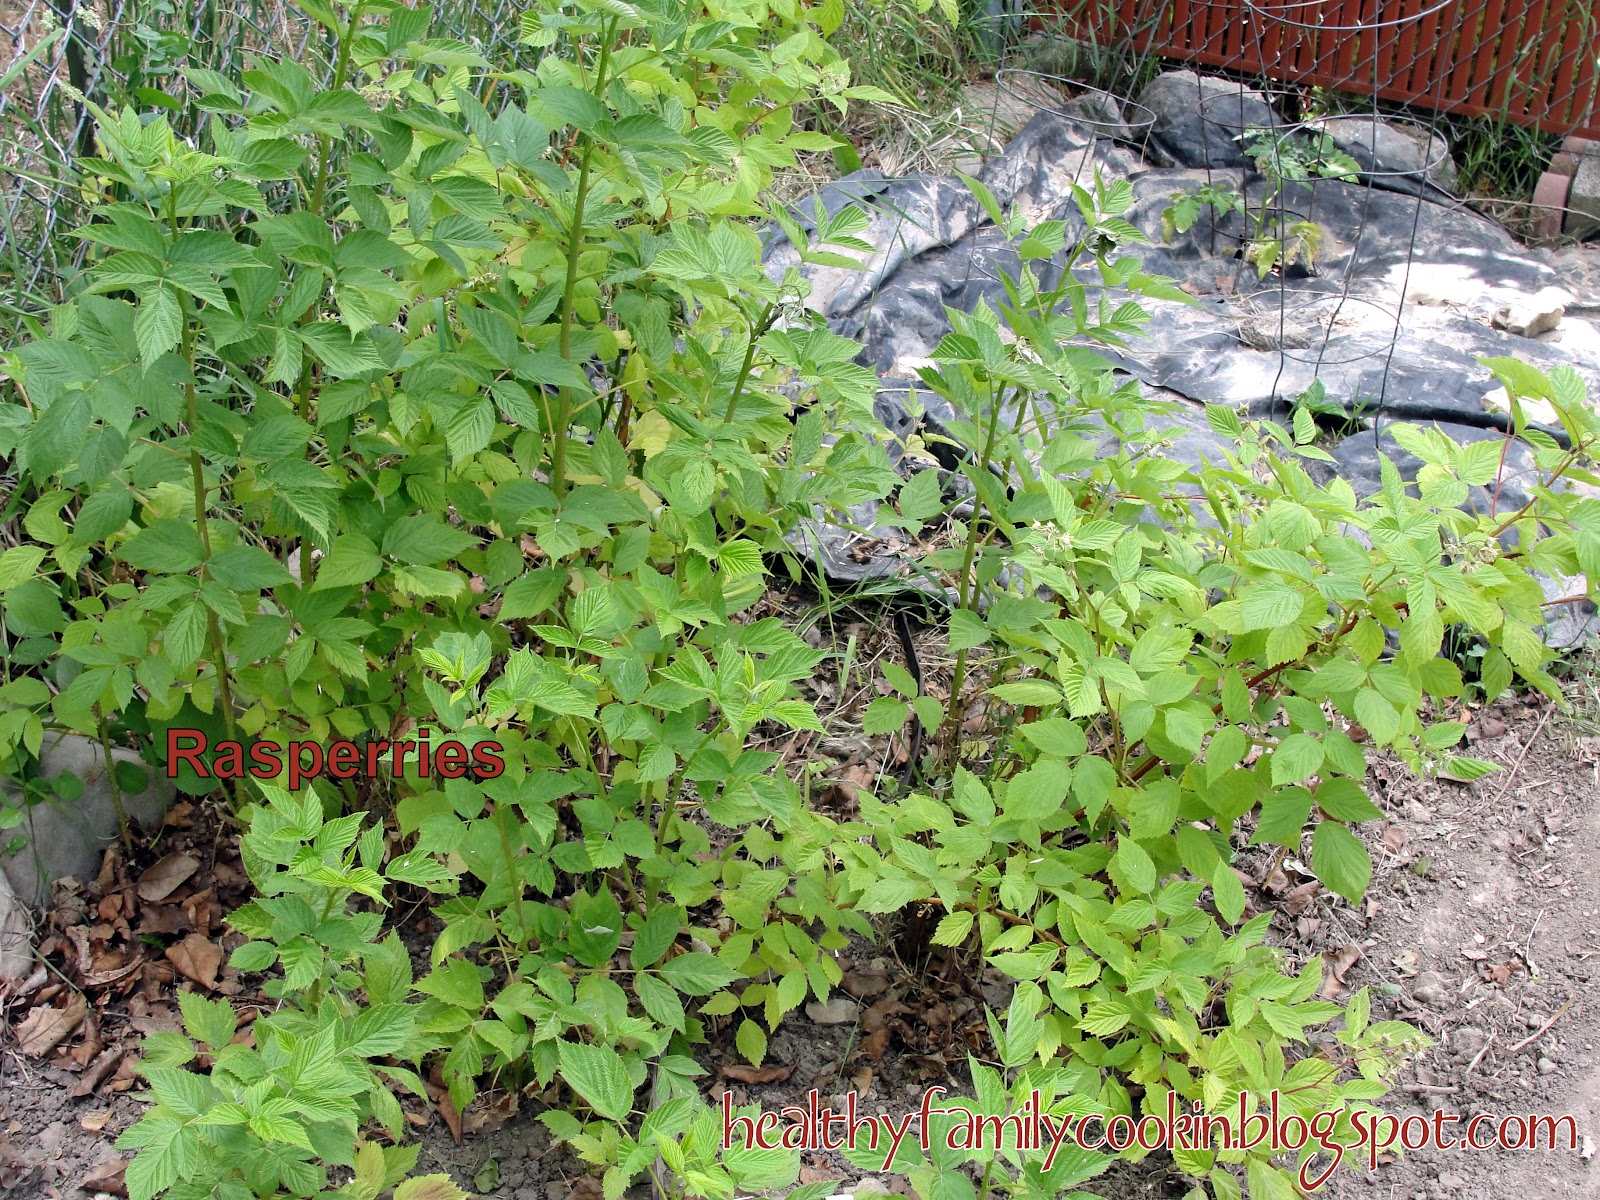
Besides strawberries we also grow Raspberries and Blackberries! They are deep rooted crops and like long, infrequent waterings. We have 3 types of blackberries that we grow and 1 kind of raspberry. Two of the blackberries are Eastern varieties that don't have thorns. They grow in a bush. The other blackberry is pictured below and is an Western Trailing Blackberry. We attach last years branches to a pole and the berries grow on those branches and the new year's growth grows below. Then we can clip off the old growth at the end of the harvest and tie up the new. Oh and guess what I used to tie the vines up with? Pantyhose! It's gentle on the vines and works great!


Orchard
Our orchard is another project we have been working on for quite some time. We planted 3 fruit trees (two peach trees and a pear) about 6 years ago and they are starting to produce pretty good.  Here's an idea of how big they as of today.


Then last year we expanded and planted two more peach trees, two more pear trees and two apple trees. Over the winter we lost an apple and a pear. So this year we replaced those trees and added a plum, an apricot, an almond, and a walnut. Thus making our orchard now consisting of 4 peach trees, 3 pear trees, 2 apple trees, a plum, an apricot, an almond, and a walnut or 13 total fruit trees!

Flower Gardens
Besides the food-bearing plants, trees, and bushes we also have inedible flowers, bushes and plants all over that add color, texture and beauty. 

And that concludes the tour of our garden. Thank you for joining me. I hope you enjoyed it and have a wonderful day!

Saturday, June 2, 2012

Favorite Children's Books: The Cat Who Wore a Pot on Her Head

This is a delightful book that is charming to read-a-loud. The story by Jan Slepian is about a cat whose name was Bendemolena. Isn't that a great name to say? And when you say it twice in a row ("Bendemolena, Bendemolena") the charm quadruples! And that's exactly what you get to do in this book. 

Well Bendemolena gets a pot stuck on her head and it covers her ears so she can't hear her Mom very well (good excuse don't you think?). Kids love it! And they love the way Bendemolena mixes up the things that her Mom asks her to do. For example, when her Mom asks her to "put the fish on to bake" she thinks she says "put soap in the cake." It's very silly and very hilarious to kids. 

One of the charming things about this book is it's ending. After Bendemolena had mixed everything up and caused a lot of chaos, her Mother finds out about it. But she isn't angry. She simply fixes the problem and encourages Bedemolena's creativity at the same time, which I love. This is a great story and one I highly recommend to your family! Enjoy.

Friday, June 1, 2012

Frugal Friday: More than 100 Frugal Summer Family Activities

When I was growing up summer meant visiting family, exploring the outdoors, playing in the water, reading books, and plenty of free time to let our imaginations take us places we'd never imagined before. Summer for me meant freedom to live as a child in a child's world. And I treasure those memories that I have from my summers. 

Now that I'm creating my own family, I've realized that it doesn't have to cost money to make memories.  In fact, some of the best memories don't cost a cent. Over-scheduling our children's (or our time) away from home and family means robbing our children of precious memories that can't be made elsewhere. With so many responsibilities and obligations, I've found that family time (and even free time) often needs to be scheduled in order to happen. Here are some frugal ideas that hopefully will get you started to brainstorm how you can make your own family memories this summer!

  1. Paint the sidewalk with ice cubes
  2. Go camping in your backyard
  3. Bubble Dancing
  4. Make Homemade Ice cream in a bag
  5. Make a Homemade Hot air balloon
  6. Go to the parade
  7. Explore the artist in you with some corn syrup paintings
  8. Dejunk the house and host a garage sale or donate it!
  9. Have a bike wash
  10. Make Balloon Rockets
  11. Feed the ducks at a local pond
  12. Make a secret hideout in your backyard
  13. Go summer sledding - find some cardboard boxes and a big, grassy hill and sled away!
  14. Create Water Bottle Bubbles
  15. Make a Super Slip and Slide
  16. Have each person design and make a boat out of things around the house. Then, take them to a river/stream and race them.
  17. Make some easy homemade sponge bombs and have a water war!
  18. Run through the sprinklers while you're watering the lawn
  19. Shop at a yard sale and see who can find the best item for under $1 or $5
  20. Host the Olympics in your backyard
  21. Make your own rainbow
  22. Sleep out under the stars
  23. Have a no-media day (or week or month!)
  24. Make a family tree
  25. Set up a bike obstacle course and have a bike rodeo
  26. Play Hopscotch
  27. Write a story and illustrate it together
  28. Sip lemonade on the patio or out under a shady tree
  29. Have a backwards dinner (eat dessert first...)
  30. Go to the library and check out as many books as you can and have a read-a-thon
  31. Find a long rope lying around the house and play jump rope
  32. Go on a picnic
  33. Have a water balloon toss
  34. Make watermelon slushies
  35. Climb a tree
  36. Go cloud watching and see what shapes you can discover
  37. Make mud pies
  38. Have a tasting party. Make different foods, blindfold people and try to guess what foods they are!
  39. Make a homemade sprinkler
  40. Make Water Balloon Yo-yos
  41. Construct something with marshmallows and toothpicks
  42. Finger paint with pudding
  43. Go to your public library for a story time or have your own at home
  44. Wash the Car (and "accidentally" squirt someone...)
  45. Have a paper airplane race
  46. Go clean up a local park or public place
  47. Go caterpillar hunting
  48. Have a backyard BBQ
  49. Make Ice Cube Boats
  50. Make puppets and put on a show!
  51. Make Ice Cream sundaes
  52. Build an outdoor obstacle course with wading pools, jump ropes, cardboard boxes, sprinklers, etc.
  53. Plant a garden
  54. Build a Fairy House
  55. Have an explosion!
  56. Build a sand castle
  57. Make Robots out of recylables
  58. Make Homemade Pretzels
  59. Go to a farmer's market
  60. Collect Grasshoppers
  61. Draw Monster Pictures on paper and squirt them with water until they fade away
  62. Make a big pot of witches brew out of water, pinecones, weeds, or anything else you can find in the backyard...
  63. Host a neighborhood block party
  64. Have a marshmallow roast
  65. Hike to a local waterfall and take a free shower!
  66. Play shadow tag - try to run away before the "it" steps on your shadow.
  67. Find a good spot to watch a sunset or sunrise
  68. Make pirate ships - Aargh mateys!
  69. Have a watermelon seed-spitting contest
  70. Make a nature collage out of things you find in nature.
  71. Perform a skit for a neighbor or friend
  72. Watch the fireworks on the 4th of July
  73. Make microwave popcorn and take it to a park to enjoy.
  74. Get out and get some frugal exercise!
  75. Pick flowers from your yard and drop them off on someone's door anonymously
  76. Play flashlight tag
  77. Be a tourist in your own town
  78. Invite your friends over for a Beach Party
  79. Find a construction project to watch from a distance
  80. Create a racetrack on the driveway
  81. Press some flowers in a book between wax paper for dried flowers
  82. Throw a birthday party for your pets or stuffed animals or an un-birthday party for your kids
  83. Go to the pet store and look at all the animals
  84. Start a collection - rocks, shells, bugs, leaves, anything!
  85. Go for a bus ride on the local bus around town - see if you can make it where you need to
  86. Go Berry Picking - there's lots of u-pick places where you pay for your berries by the pound.
  87. Visit a cemetery and put flowers from your garden on someone's grave
  88. Have a family game night with prizes!
  89. ABC Hunt- Write all 26 letters on your driveway and find items to place next to each letter.
  90. Do a kid fun run
  91. Make Rootbeer Floats
  92. Make Tin Foil Dinners and cook them in the oven.
  93. Go to a new playground
  94. Read a chapter book together
  95. Have a 3-legged race
  96. Look at something through a magnifying glass
  97. Practice drawing with your toes
  98. Make sand faces
  99. Play red light green light
  100. Put on an outside dance
And if that's not enough ideas for you, here's a few more!


Popular Posts

LinkWithin

Related Posts with Thumbnails